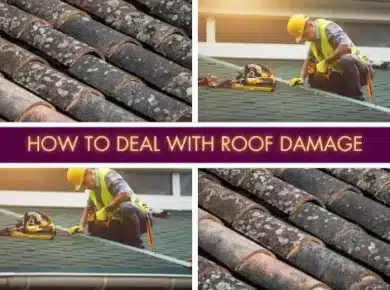
Concrete tile roof repair becomes necessary for many homeowners at some point. These durable roofing options protect homes across the country from harsh weather elements. Without proper maintenance, even the strongest roof can develop issues.
Water damage from cracked tiles can harm your home’s structure. Small problems can grow into costly repairs when ignored. This guide walks you through everything you need to know about repairs.
We’ll help you identify problems, explore concrete tile roof repair options, and maintain your roof. Let’s discover how to keep your concrete tile roof performing at its best.
Understanding Concrete Tile Roofs
Concrete tile roofs remain a popular choice for many homeowners nationwide. They combine visual appeal with excellent durability and weather resistance. Understanding what these roofs are made of helps explain their needs.
What Are Concrete Tile Roofs?
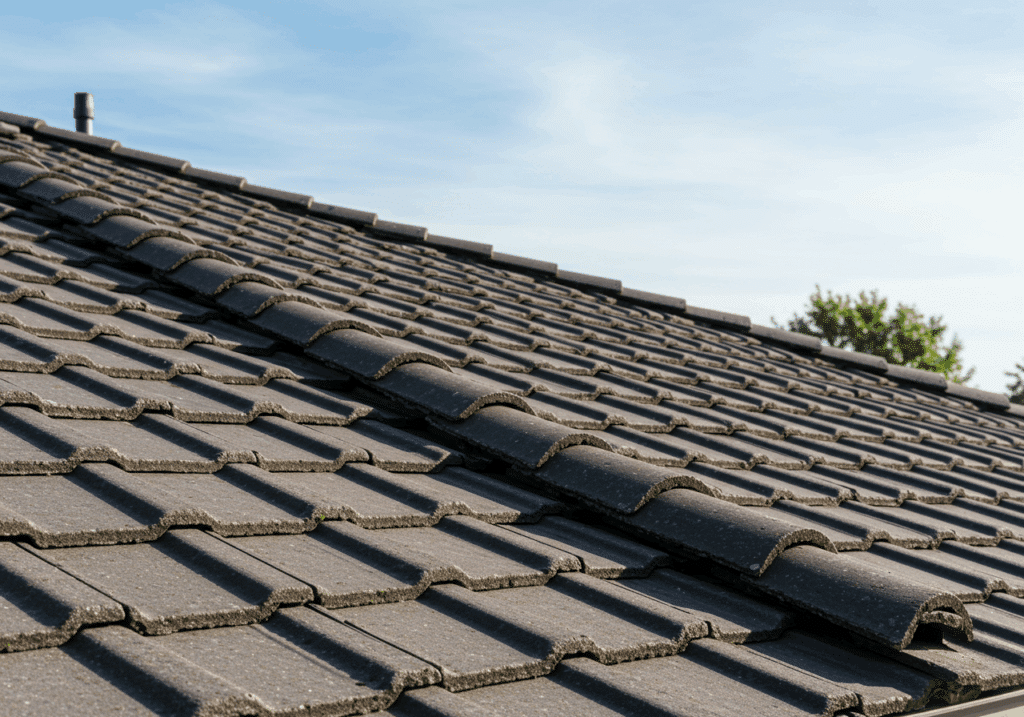
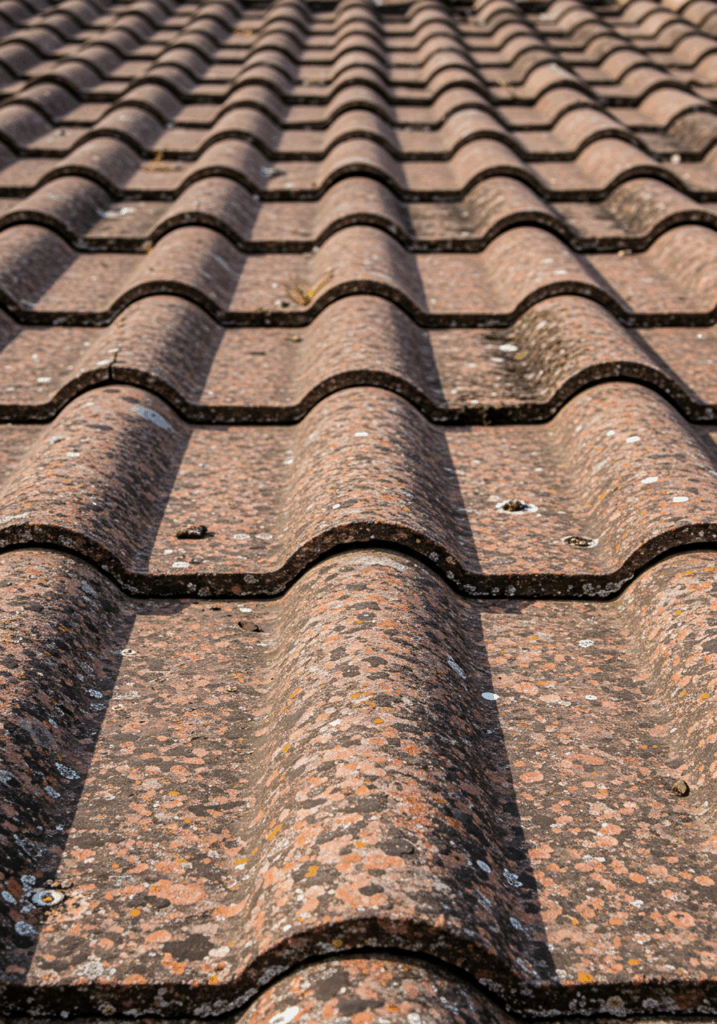
Concrete roof tiles contain a mix of sand, cement, and water. Manufacturers form this mixture into various shapes and styles. Some tiles mimic the look of clay, slate, or wood shakes. The manufacturing process includes adding color either throughout the material or as coating. These tiles typically weigh between 900-1200 pounds per 100 square feet. Their weight provides excellent wind resistance in most settings. The design allows air to flow beneath the tiles for cooling benefits.
Most concrete tiles include ribs or ridges on their undersides. These features prevent water from moving upward under the tiles. When installed correctly, they create a barrier against rain and snow. Concrete tiles come in many profiles, from flat to highly curved styles. This variety allows homeowners to match architectural styles from Mediterranean to modern.
Benefits of Concrete Tile Roofs

Concrete roof tiles can last 50 years or more with proper care. This impressive lifespan makes them cost-effective despite higher initial installation costs. Many manufacturers offer warranties ranging from 30 to 50 years. These long-term guarantees show confidence in the product’s durability.
These roofs resist fire exceptionally well compared to many alternatives. Their non-combustible nature provides added safety for your home. The thick concrete material also blocks sound from rain or outside noise. This feature creates a quieter indoor environment during storms. The thermal mass helps regulate temperatures, potentially lowering energy costs.
Color options extend far beyond traditional terra cotta. Modern concrete tiles come in dozens of shades and finishes. This variety allows for matching virtually any home exterior style. Some tiles even feature special reflective coatings to reduce heat absorption.
Common Issues with Concrete Tile Roofs
Despite their strength, concrete tiles face several common problems over time. Cracks can appear from impact damage, foot traffic, or freeze-thaw cycles. These cracks allow water to penetrate the roof’s waterproof barrier. Water damage represents the most serious threat to your roof’s integrity.
Tiles may shift out of position due to strong winds or improper installation. This movement creates gaps where water can enter and cause damage. Misaligned tiles also affect the roof’s appearance and weather resistance. Fasteners holding tiles in place may fail over time, requiring attention.
Older concrete tile roofs often develop issues with the underlayment beneath tiles. This waterproof layer typically lasts 20-30 years before needing replacement. Signs of aging underlayment include leaks despite tiles appearing intact. This concrete tile roof repair requires removing and reinstalling tiles, making it more complex.
Signs Your Concrete Tile Roof Needs Repair
Knowing when your roof needs attention helps prevent small issues from growing. Here’s how to recognize problems early.
Visual Indicators
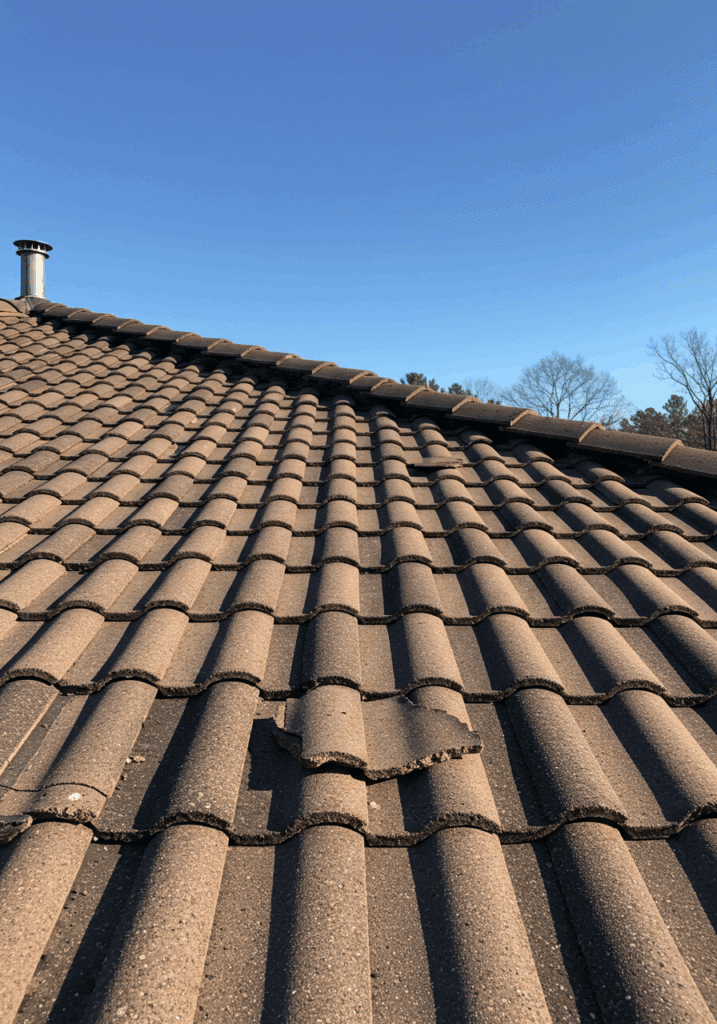
Broken or cracked tiles remain the most obvious sign of needed repairs. Look for chips, cracks, or completely broken pieces on your roof. Use binoculars from ground level for safety during inspections. Discoloration spots on ceilings may indicate water leaking through damaged areas.
Check your gutters for granules or small concrete pieces. These fragments indicate deteriorating tiles that need attention. Uneven roof sections might show that tiles have shifted from their original positions. Moss or algae growth can signal moisture problems and potential damage.
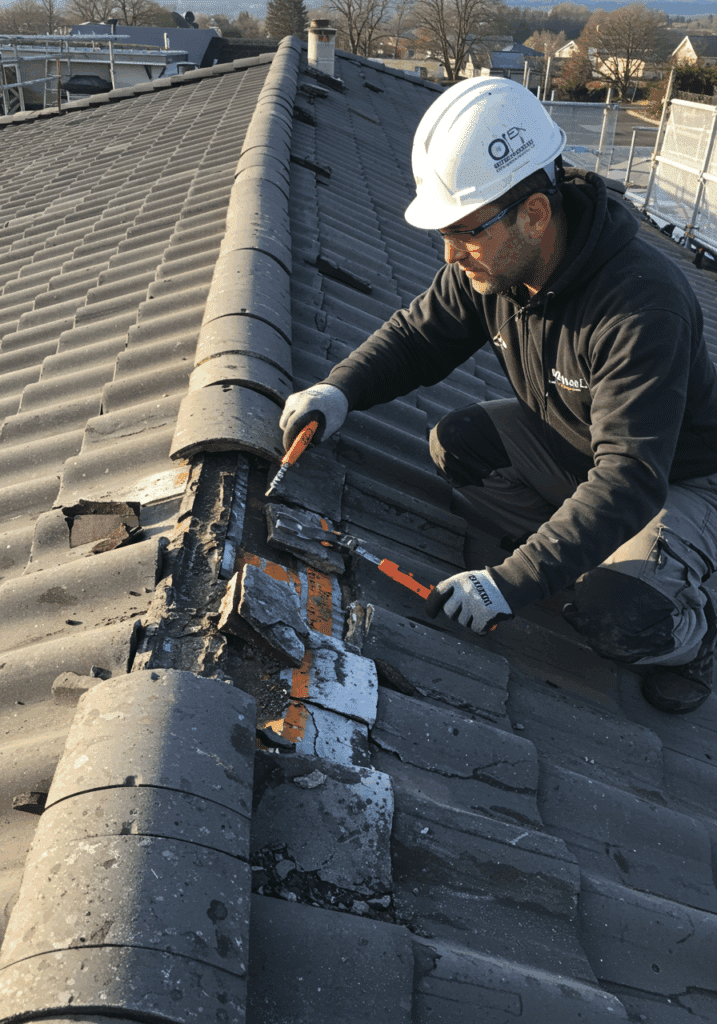
Ridge tiles often show damage first, as they face direct exposure. Look for crumbling mortar between ridge tiles or missing sections. Flashing around chimneys or vents may show signs of rust or separation. These areas commonly develop leaks that require prompt attention.
Functional Problems
Water stains on ceilings provide the clearest sign of roof leakage. These discolorations often appear as yellow or brown spots that grow over time. Increased energy bills might indicate compromised roof insulation from water damage. Feeling drafts in upper rooms could suggest gaps in your roofing system.
Check your attic for signs of moisture after heavy rains. Wet insulation, wood, or visible water drops indicate roof leaks. Look for sunlight showing through the roof boards during daytime attic visits. These light spots reveal potential gaps where water can enter.
Sagging areas on your roof surface may indicate structural problems underneath. This condition requires immediate professional assessment to prevent collapse. Poor drainage causing water pooling can lead to leaks and structural damage.
When to Act Quickly
Address any water leaks immediately to prevent extensive interior damage. Even small leaks can cause mold, rot, and insulation damage over time. Schedule repairs before your area’s rainy season for best protection. This timing helps ensure your roof stays watertight during wet months.
After major storms, check your roof for new damage requiring attention. High winds, hail, or falling branches often cause immediate tile damage. Replace broken tiles quickly to protect the underlayment from water exposure. Damaged underlayment leads to much costlier repairs when ignored.
If you notice multiple problems developing at once, consider a thorough inspection. Professional roofers can identify issues you might miss from ground level. They can also safely access steep or high roof areas for better assessment.
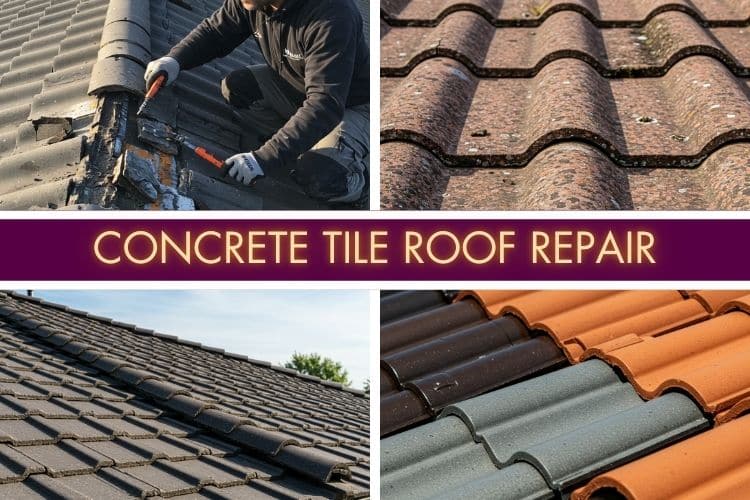
Common Types of Concrete Tile Roof Damage
Understanding what damages concrete tiles helps identify proper concrete tile roof repair methods. Here are the most frequent issues homeowners face.
Cracked or Broken Tiles
Impact damage from falling tree limbs represents a common cause of breakage. Large hailstones may also crack tiles during severe storms. The damage typically appears as clean breaks or star-shaped cracks. These openings allow water to reach the underlayment and potentially enter your home.
Walking on tiles improperly can create cracks in the material. Concrete tiles aren’t designed to support direct weight in their center sections. Concrete tile roof repair technicians use special techniques to walk on roofs without causing damage. Homeowners should avoid walking on tile roofs whenever possible.
Extreme temperature cycles cause concrete to expand and contract over time. This natural process can lead to stress cracks in older tiles. Manufacturing defects sometimes cause tiles to crack prematurely. Quality tiles from reputable manufacturers typically have fewer such issues.
Displaced Tiles
Strong winds can lift and shift tiles out of their proper position. Proper installation with secure fastening helps prevent this problem. Tiles installed without enough overlap may shift more easily during storms. This movement creates openings where water can penetrate your roof system.
Improper installation might leave tiles vulnerable to movement over time. Each tile should sit correctly on battens and connect securely to the roof. Animals seeking shelter sometimes move tiles while looking for entry points. Regular roof inspections can catch and correct these issues before leaks develop.
House settling over time affects how tiles sit on their supporting structure. This natural process can create slight gaps or alignment issues. Professional roofers can readjust tiles to maintain proper coverage and water flow.
Deterioration Over Time
Concrete naturally wears down after years of exposure to weather elements. Surface coatings fade and thin after decades of sun exposure. The material may become more porous and absorb more water. This absorption can lead to cracks during freeze-thaw cycles in colder regions.
Edges of tiles may crumble or soften with age, especially in harsh climates. This deterioration affects how well tiles channel water off your roof. Color fading affects appearance but doesn’t always indicate functional problems. Some homeowners choose to recoat or color-restore older but structurally sound roofs.
The cement in concrete tiles can gradually lose strength over decades. This aging process happens faster in areas with acid rain or pollution. Quality tiles with proper maintenance can resist this deterioration for 50+ years.
Weather-Related Damage
Heavy snow loads might stress tiles beyond their weight capacity. While concrete tiles handle weight well, extreme snow accumulation needs attention. Ice dams form when snow melts and refreezes at roof edges. These dams force water under tiles, potentially causing leaks.
UV radiation gradually breaks down concrete tile surfaces over many years. This damage appears as color fading and surface roughening. Salt air in coastal areas accelerates deterioration of concrete materials. Special sealants can help protect tiles in these harsh environments.
Extreme temperature fluctuations stress tile materials over time. Rapid cooling and heating cycles can eventually lead to cracking. This issue affects roofs in climates with very hot days and cold nights.
DIY Concrete Tile Roof Repair vs. Professional Services
Deciding whether to tackle repairs yourself or hire professionals depends on several factors. Consider these guidelines when making your choice.
When You Can DIY
Replacing one or two accessible broken tiles works as a DIY project. You’ll need matching replacement tiles and proper safety equipment. Simple cleaning of debris from valleys and gutters prevents water problems. This maintenance helps water flow properly off your roof surface.
Minor moss or algae removal using appropriate cleaners can be DIY-friendly. Always use products specifically designed for concrete tile roofs. Harsh chemicals can damage tile surfaces and reduce their lifespan. Follow manufacturer guidelines for any products you apply.
Inspecting your roof from ground level with binoculars helps identify problems. Look for cracked, missing, or displaced tiles that need attention. Early problem detection allows for simpler, less costly repairs.
When to Call a Professional
Large areas of damage require professional assessment and repair work. Experts can identify underlying issues that might not be visible. They bring proper equipment and techniques for complex repairs. This expertise prevents further damage during the concrete tile roof repair process.
Structural issues beneath tiles always need expert attention. Signs include sagging roof sections or interior ceiling damage. These problems indicate more serious concerns beyond simple tile replacement. Professional roofers can address both symptoms and root causes.
Leaks that continue after DIY repairs signal bigger underlying problems. Water might be entering from areas different than where damage appears. Complete roof restoration should always be done by qualified professionals. These major projects require proper techniques and equipment for success.
Safety Considerations
Roof work presents serious fall hazards, especially on sloped concrete tile roofs. Always use proper fall protection equipment when working at height. OSHA recommends full harnesses for any roof work above 6 feet. Never attempt roof work in wet, windy, or icy conditions.
Concrete tiles break easily when walked on incorrectly. Professionals know to step near tile edges where support is strongest. Improper foot placement can cause more damage than you’re trying to repair. Wear soft-soled shoes if you must walk on the roof.
Proper ladder safety remains essential for any roof work. Place ladders on solid, level ground and extend them 3 feet above the roof edge. Secure the ladder top to prevent slipping during use. Having a helper stabilize the ladder adds important safety protection.
Step-by-Step Guide to Repairing Concrete Tile Roofs
If you decide to tackle smaller repairs yourself, follow these detailed steps. Always prioritize safety throughout the process.
Tools and Materials Needed
For basic repairs, gather these essential items before starting:
- Replacement tiles matching your existing roof
- Roofing cement or adhesive for securing tiles
- Roofing nails or screws (if needed)
- Pry bar for carefully removing damaged tiles
- Hammer and chisel for breaking and removing damaged pieces
- Utility knife for trimming underlayment patches
- Safety harness for fall protection
- Sturdy ladder with proper height for your roof
- Gloves and safety glasses for personal protection
Consider renting specialized roofing tools for larger projects. A roofing nail gun speeds up the process for multiple repairs. Tile cutters help shape replacement tiles for exact fits. Always read manufacturer instructions for any tools or materials.
Preparation Steps
Check weather forecasts before scheduling your repair day. Plan for clear, mild conditions with no rain or strong winds. Clear all debris from the repair area and surrounding tiles. This cleaning prevents dirt from getting under tiles during repairs.
Take clear photos before starting to document the original layout. These images help ensure proper replacement positioning. Set up stable ladders with the proper angle and secure footing. The base should sit one foot away from the wall for every four feet of height.
Organize all tools and materials before climbing onto the roof. Using a tool belt keeps items handy while leaving hands free. Consider using a rope and bucket system to raise materials to the roof. This method reduces trips up and down the ladder.
Repair Process for Different Issues
Follow these steps for replacing broken tiles:
- Locate and examine the damaged tile fully
- Carefully break the damaged tile into smaller pieces for removal
- Remove all fragments without damaging surrounding tiles
- Clean the area and check underlayment for damage
- Apply roofing cement to the replacement tile’s edges
- Slide the new tile into position from below
- Secure with adhesive or mechanical fasteners as appropriate
- Check that the new tile aligns properly with surrounding tiles
For fixing displaced tiles:
- Gently lift surrounding tiles without causing breakage
- Remove any debris that caused the displacement
- Check for damaged fasteners that need replacement
- Apply fresh roofing cement to the tile’s position
- Carefully reset the tile in its proper location
- Press firmly to ensure proper adhesion
- Verify water will flow correctly over the repaired section
For repairing ridge tiles and mortar:
- Remove loose or damaged mortar using a chisel
- Clean the area thoroughly to remove all debris
- Mix new mortar according to manufacturer specifications
- Apply new mortar bed beneath ridge tiles
- Press ridge tiles firmly into the fresh mortar
- Shape and smooth mortar joints for proper appearance
- Allow proper curing time before exposing to weather
Preventative Maintenance for Concrete Tile Roofs
Regular maintenance extends your roof’s life and prevents costly repairs. Follow these guidelines to keep your concrete tile roof in top condition.
Regular Inspection Tips
Inspect your roof twice yearly, ideally in spring and fall. Look for cracked, broken, or displaced tiles each time. Pay special attention to valleys, edges, and areas around vents. These locations tend to develop problems more frequently.
Check metal flashings around chimneys, vents, and roof penetrations. Look for rust, separation, or damaged sealant that needs attention. Examine the condition of mortar on ridge tiles for cracks or deterioration. These areas often need repair before other roof sections.
Watch for signs of water intrusion in your attic after heavy rains. Stains, dampness, or mold indicate potential roof leaks. Address these issues immediately to prevent structural damage. Consider hiring professionals for thorough inspections every 3-5 years.
Cleaning Guidelines
Remove leaves and debris regularly to prevent water damming. Pay special attention to valleys where water flow concentrates. Clogged valleys can force water under tiles and cause leaks. Use a soft brush or leaf blower for safe debris removal.
Clean gutters at least twice yearly to ensure proper water drainage. Clogged gutters cause water to back up under roof edges. This backup leads to fascia damage and potential leaks. Gutter guards can reduce maintenance needs in debris-prone areas.
Treat moss or algae with appropriate cleaning solutions when necessary. Use products specifically designed for concrete tile roofs. Avoid pressure washing, which can damage tile surfaces and seals. Gentle cleaning preserves the roof while maintaining its appearance.
Seasonal Maintenance
Clear heavy snow carefully to prevent excessive weight on tiles. Use a roof rake with plastic edge from ground level when possible. Avoid metal tools that can damage tile surfaces. Never chip ice directly from tiles, as this causes breakage.
Trim overhanging branches before storm seasons arrive. Branches scraping against tiles can wear down surfaces over time. Falling limbs present a major damage risk during storms. Maintaining a minimum 10-foot clearance protects your roof effectively.
Check for animal nests or damage in spring and fall. Birds, squirrels, and other wildlife may damage tiles seeking shelter. Repair any access points to prevent further intrusion. Professional pest control services can help with removal if needed.
Costs of Concrete Tile Roof Repair
Understanding potential costs helps plan for necessary repairs. Here’s what to expect financially when addressing roof issues.
Average Costs
Concrete tile roof repair costs vary widely based on damage extent and local labor rates. The following table summarizes typical costs for different repair types:
| Type of Repair | Average Cost | DIY Suitable? | Professional Recommended? |
|---|---|---|---|
| Single tile replacement | $20-50 per tile | Yes | No |
| Small area repair (5-10 tiles) | $300-700 | Sometimes | Yes |
| Ridge tile repointing | $500-1,200 | Sometimes | Yes |
| Leak repair | $400-1,000 | No | Yes |
| Partial roof replacement | $2,000-5,000 | No | Yes |
| Full roof restoration | $7,000-15,000+ | No | Yes |
| Color restoration/recoating | $2,000-4,000 | No | Yes |
| Underlayment replacement | $4,000-9,000 | No | Yes |
Labor typically accounts for 40%-60% of total repair costs. Materials make up the remaining portion of repair expenses. More complex jobs have higher labor percentages due to skill required.
Factors Affecting Cost
The size of your roof directly impacts total repair costs. Larger roofs require more materials and labor for equivalent repairs. Your roof’s pitch or steepness affects difficulty and therefore cost. Steeper roofs require more safety equipment and time to complete work.
Your geographic location influences local labor rates significantly. Urban areas typically have higher costs than rural locations. The extent of damage determines how much work is needed. Minor repairs cost much less than major restoration projects. Accessibility issues can increase time and labor expenses.
Material quality choices affect both immediate and long-term costs. Higher quality materials cost more initially but often last longer. Special features like custom tiles or complex designs increase prices. These factors should be considered when budgeting for repairs.
Ways to Save Money
Regular maintenance prevents costlier repairs later by catching problems early. Simple tasks like keeping gutters clean prevent water damage. Addressing small issues before they grow saves considerable money. This proactive approach extends roof life while reducing concrete tile roof repair costs.
Getting multiple quotes helps find reasonable pricing without sacrificing quality. Ask for detailed breakdowns showing labor and material costs separately. This transparency helps identify where potential savings exist. Be wary of estimates significantly lower than others—quality may suffer.
Doing simple tasks yourself reduces labor costs for professional repairs. Clearing debris and performing basic inspections save money. Save receipts for any roof work—repairs may be tax-deductible improvements. Insurance might cover damage from storms or accidents, reducing out-of-pocket costs.
Extending the Life of Your Concrete Tile Roof
With proper care, your concrete tile roof can serve your home for decades. Follow these strategies to maximize its lifespan.
Best Practices
Avoid walking on tiles whenever possible to prevent cracks and breakage. If access is necessary, step near the lower edges of tiles. These areas have better support from underlying battens. Consider installing designated walkways for regular maintenance access.
Keep trees trimmed away from your roof to prevent multiple problems. Overhanging branches drop debris that holds moisture against tiles. Falling limbs can cause serious impact damage during storms. Shade from trees can promote moss growth on north-facing sections.
Clean gutters regularly to prevent water backup and roof edge damage. Clogged gutters force water under tiles at roof edges. This water damages underlayment and can enter your home. Gutter guards reduce maintenance needs while protecting your roof.
Address small repairs promptly before they grow into major problems. A single broken tile can allow water to damage large sections of underlayment. This proactive approach saves money while extending roof life. Professional inspections every 3-5 years catch issues you might miss.
Products That Help
Roof sealants designed for concrete tiles help extend their lifespan. These products reduce water absorption and protect against freeze-thaw damage. Apply according to manufacturer instructions for best results. Quality sealants typically last 5-10 years before needing reapplication.
Waterproof underlayment provides extra protection against leaks. Consider upgrading to synthetic underlayment during major repairs. These modern materials last longer than traditional felt paper. The extra cost pays off through extended protection and fewer leaks.
Proper attic ventilation helps regulate temperature and moisture under your roof. This regulation prevents condensation damage to roof structures. Adequate ventilation extends underlayment life by reducing moisture exposure. Consult with professionals about optimal ventilation for your home.
Gutter guards prevent debris buildup and associated water problems. These systems allow water to flow while blocking leaves and twigs. This protection reduces maintenance needs and prevents overflow. Various styles offer different benefits and price points.
Professional Maintenance Options
Annual service contracts ensure regular professional attention for your roof. These plans typically include inspections and minor repairs. The regular care prevents problems from developing or growing. Many companies offer discounts for ongoing maintenance agreements.
Roof washing services safely remove moss and algae without damage. Professional cleaners use appropriate products and techniques. They know how to work without walking on and damaging tiles. These services typically cost $250-$500 depending on roof size.
Professional recoloring can refresh faded concrete tiles effectively. This process applies new color coatings to existing tiles. The treatment restores appearance while adding surface protection. Costs typically range from $2,000-$4,000 for average homes.
Complete restoration can add decades to your roof’s life when needed. This major service includes replacing damaged tiles and underlayment. Professionals check and repair structural elements during restoration. While expensive, restoration costs much less than full replacement.
Conclusion
Your concrete tile roof represents a significant investment in your home’s protection. Regular inspections help catch and address problems early. Simple maintenance prevents many issues before they develop into leaks. Understanding when to handle repairs yourself versus calling professionals saves time and money. With proper care, your concrete tile roof will protect your home for decades. Take action now to assess your roof’s condition and address any needed repairs. This proactive approach ensures your home stays dry and protected through all seasons.